DIY MACRAME WALL HANGING
here it is friends! if you're anything like me, you'll love this cute, easy, less than one hour DIY. as much as i love the creative makers of macrame (who are much, much more talented than I in this); i could not get myself (or Hunter haha) to purchase one for over $300. not there yet in life...but if you are - congratulations ;) so whether you can afford one or not, this is for you - because who doesn't love to create and use their amazing hands?!

HERE'S HOW YOU DO IT: (steps left to right)


STEP 1: Shop your local craft store (or cupboard) for 3 yarn skeins, colors of your choice. There are soooo many different designs/patterns/colors you can do with macrame, same concept either way. You will also need 1 wood dowel. Mine was 36" but you can do any size you'd like!
STEP 2: Cut your yarn double the length you actually want it to be. You want to do this because of the way you will be tying it. For example; if you want your longest piece to be 2', cut 4'. Do this with all colors. (one thing i would have done different is cut them all long, then trim at the end). Fold yarn in half to create the loop.
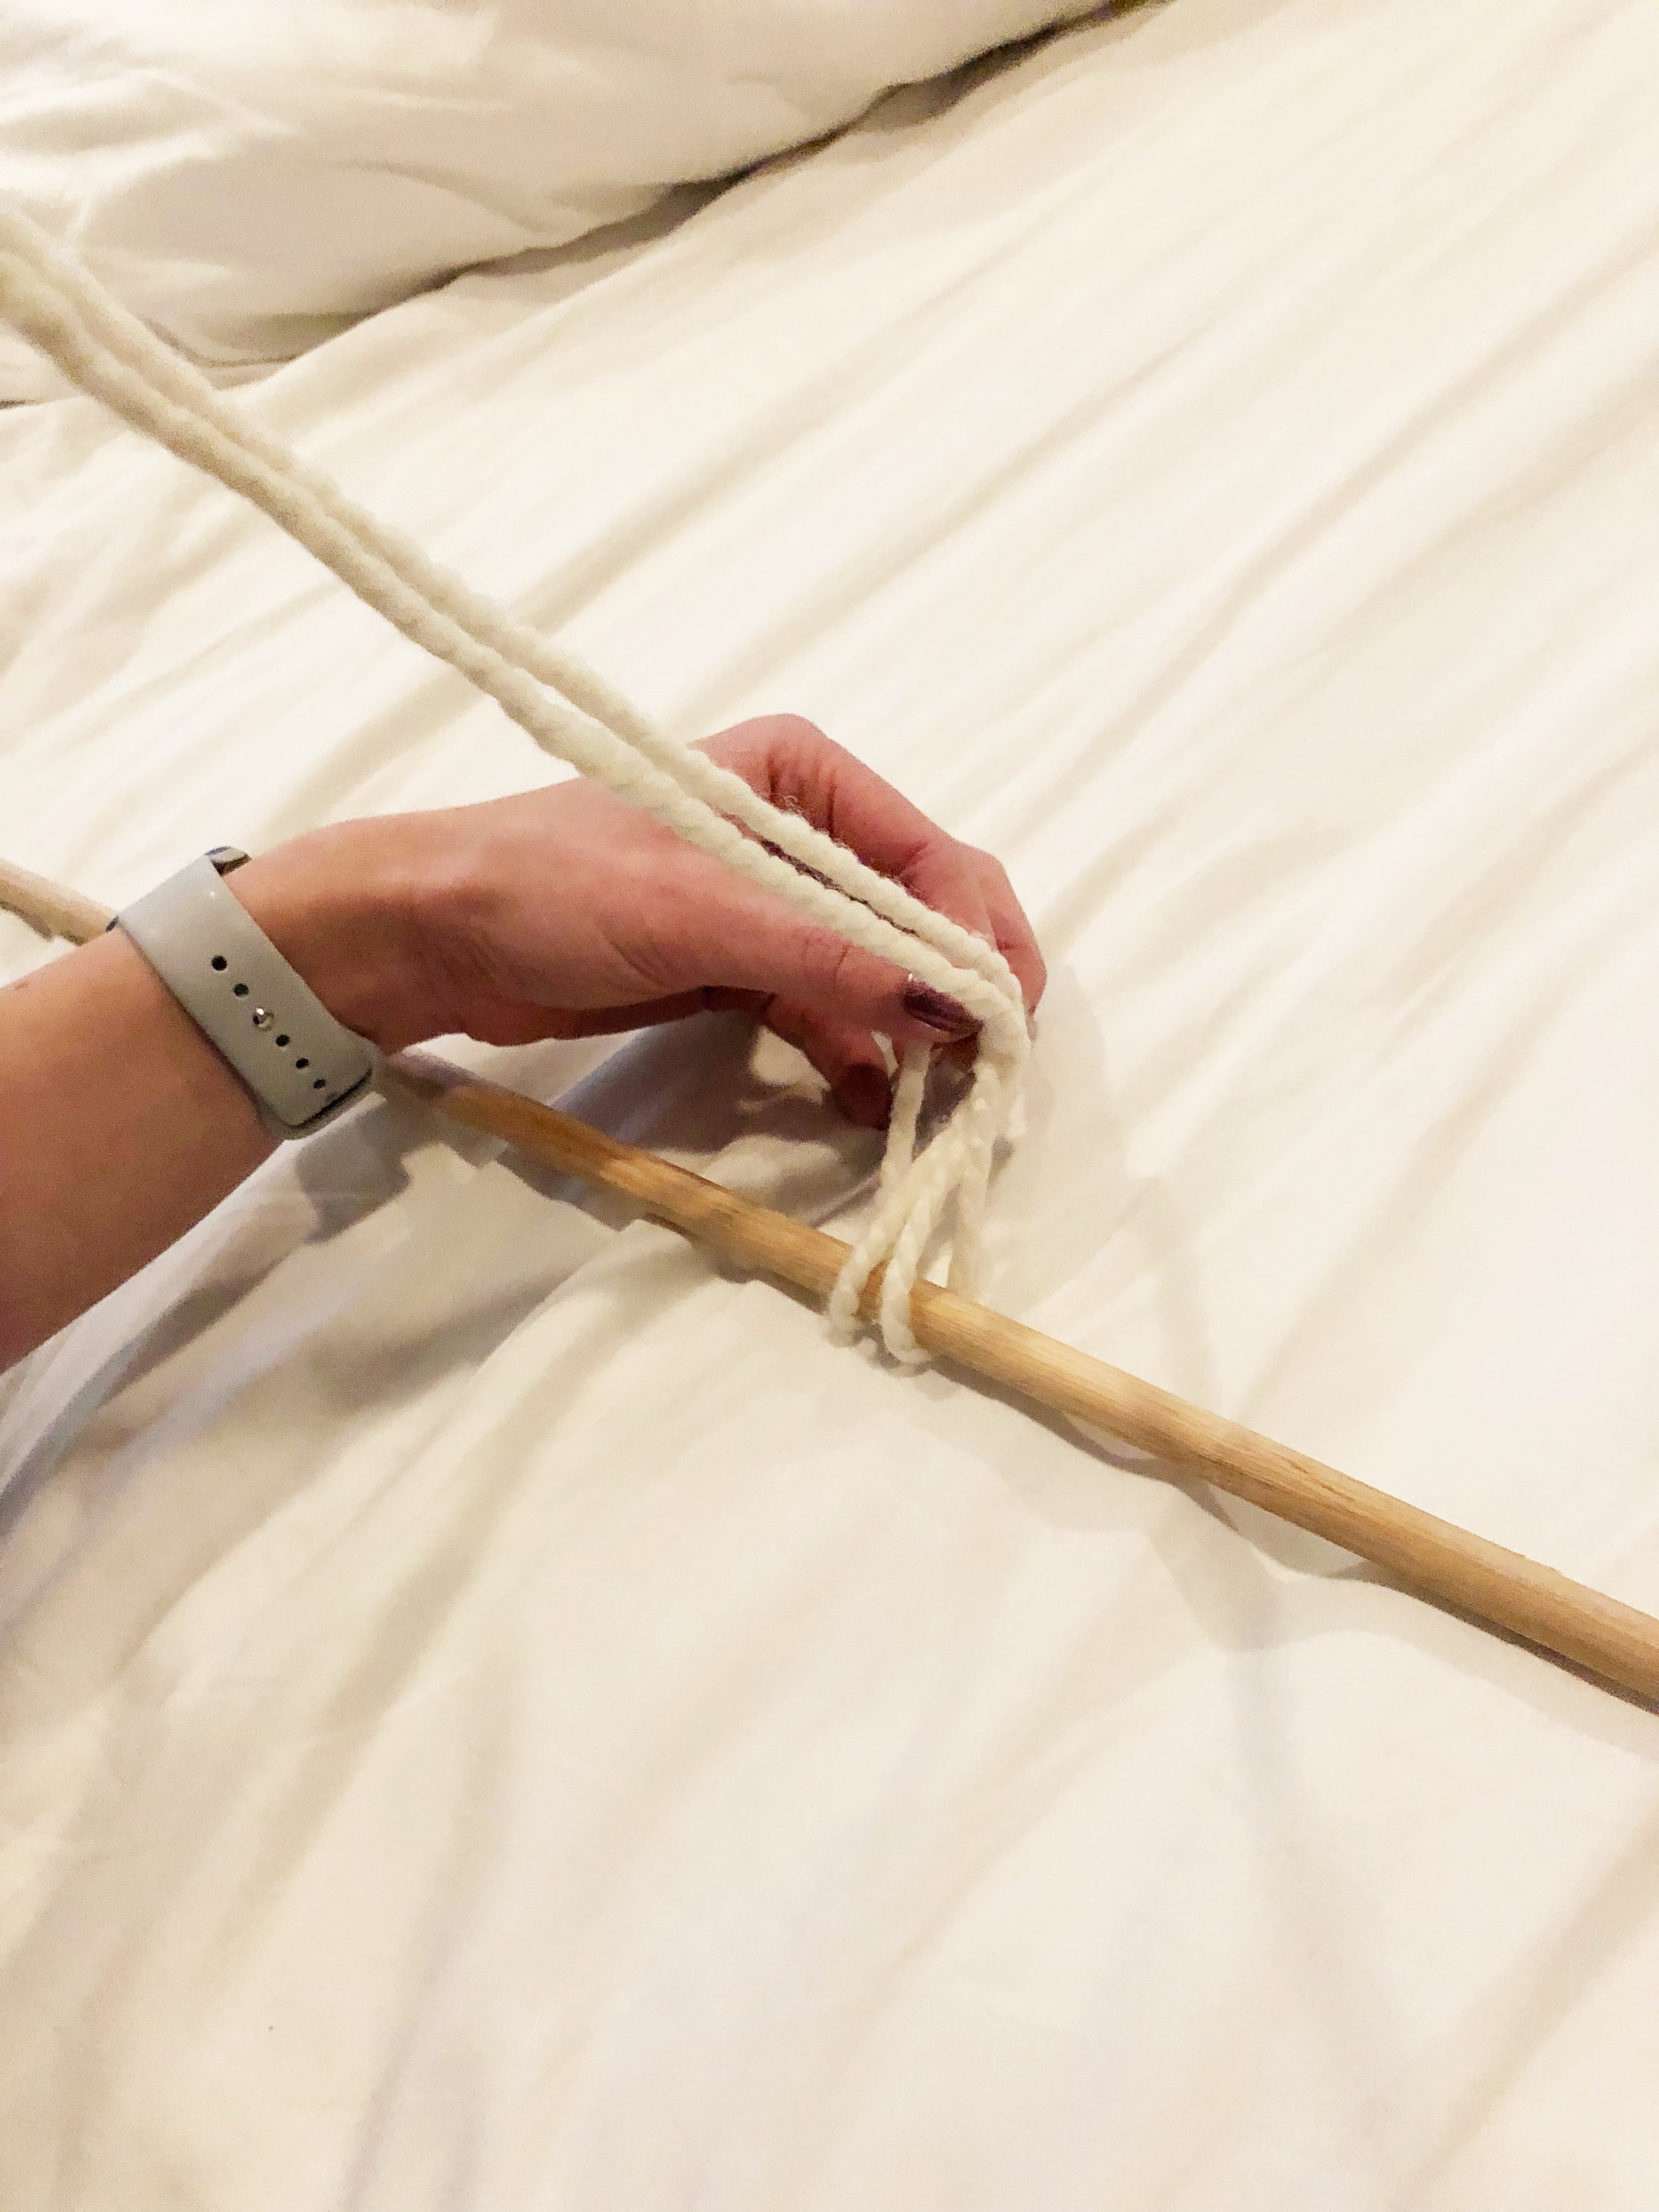
STEP 3: Slid yarn under the dowel to prepare for tying the knot.
STEP 4: Pull yarn completely through the loop to create the knot. Pull to tighten. Your knot will be backwards if you follow the photos exact. Don't fret, the back side exposes the cute knot look.
STEP 5: Continue step 3-4 until you have the necessary amount for the pattern you desire. Luckily the yarn is really easy to slide and untie to re tie if needed.
STEP 6: Add a new color! With the burnt orange i did 7 knots on either side of the white. Then 7 knots of green on either side of the burnt orange.
STEP 7: Trim. As you can see in the last image, all the yarns are uneven. Depending on the pattern you choose to do: you can cut it straight across or like this one; use a yard stick to keep your angles straight and trim the excess yarn to create a tapered design. Do this slow. You can always trim a little more, but you can't add yarn once you've snipped it! *I had my husband put his eyes on it as well to make sure it was even!
STEP 8: Tie on rope/hemp string/twine on both ends to create a wall hanging.
I hope you loved creating this DIY Macrame Wall Hanging as much as i did! Share it on instagram using hashtag #alikacreates -- i'd LOVE to see how you DIY!
(Alika used & modified this diy wall hanging guide)